How To Record Screen on iPhone Without Apps, Easy Way
How to record screen on iPhone without application, if you need to shoot a video screen for iPhone or iPad for any reason, then you no longer need to install any third-party applications from the store, but you can do so through a simple trick in iOS 11.
Previously, the only official way to capture a screen video for iPhone was for the user to connect the phone to a Mac computer in order to use QuickTime Player, which helps you record the screen as a video.
And if you were looking for an easier way, you had to install unofficial apps from the AppStore. But all of these methods are a thing of the past now, as there is an official method from Apple that allows screen recording of video for iOS +11 users.
Built-in Record Screen on iPhone
Starting with the iOS 11 release, the “Screen Recording” tool has been integrated, which can not only be used to record iPhone screen videos, but also audio recorders. After the recording is completed, the video is saved in the Photos application, where you can use editing tools so that you can edit the recorded video before sharing it with others. Now let’s take a look at how to use the tool.
The “Screen Recorder” tool is one of the new shortcuts that have been added to the Control Center in iOS 11, but it does not appear under the shortcuts by default, screen app but the user needs to complete some steps in order to be able to add a shortcut to the tool in the Control Center app, this The steps are:
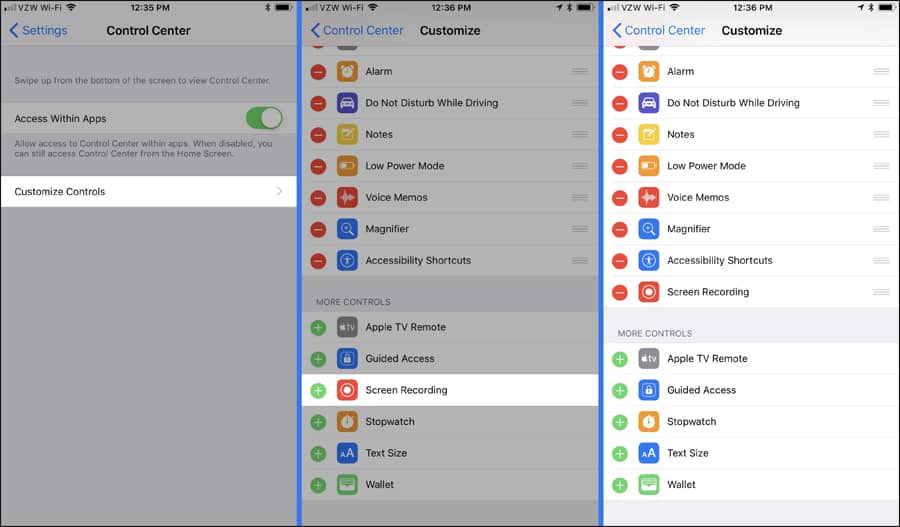
- Go to Settings.
- Click on the Control Center section.
- From there click on Customize Controls.
Now scroll to the bottom until you click on the “➕” sign next to Screen Recorder to add a tool shortcut with the shortcuts that appear in Control Center.
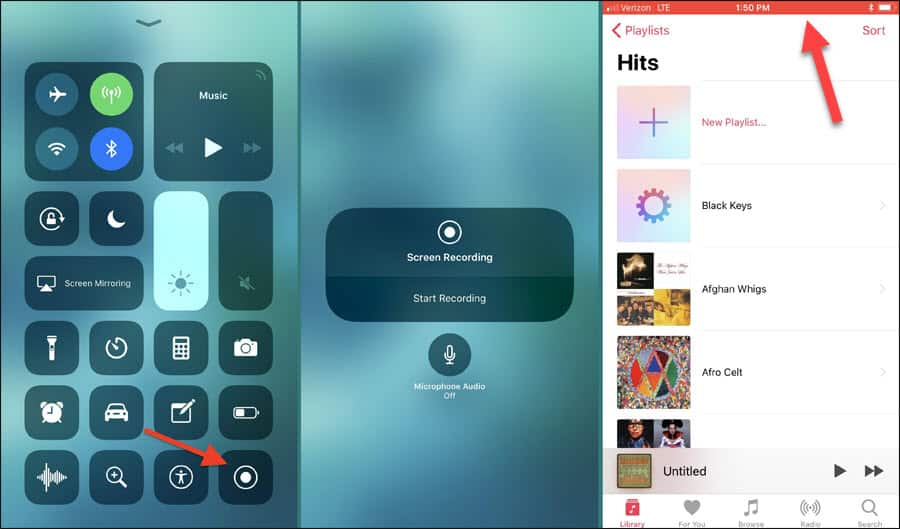
Now that you have added a shortcut for the “Screen Recorder” tool in the Control Center, all you have to do is swipe up to display the Control Center and the shortcuts it contains app, including the screen recording tool referred to in the image attached above after you click On it.
You can activate the “Microphone Audio” button to record the sound with the video if you want to.
Then to start record screen, press “Start Recording” and then wait for the three-second countdown to immediately move to the main screen and you will notice that the status bar at the top has become red, which means that you are in record screen now, and it will remain that way wherever you move between Applications until recording is stopped.
Now that you have finished, you will need to stop recording. You can do that by swiping to the top to open Control Center, then click on the “Screen Recording” icon, then click on the “Stop Recording” button.
Alternatively, you can click on the red status bar at the top and then press the Stop button from the confirmation message that appears. Once you stop recording, you will receive a notification that you can click to quickly view the video in the Photos app.
In the Photos application, where you can find the recorded video, you can play the video and press the “Edit” button at the top to move to the video editing screen.
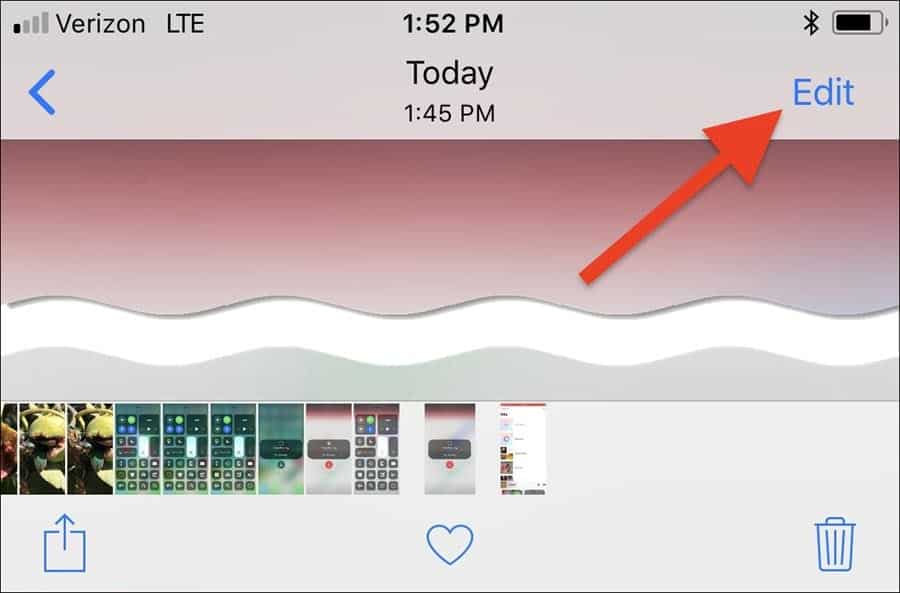
From there you can cut the video through the yellow animation bar at the bottom app, and when you are satisfied with the result, press Done at the bottom left and select “Save as New Clip”.
This won’t replace the original clip, so don’t worry.
You can record screen of your iPhone as many as your storage can save.

3 Comments
Me parece excelente
LmaWhatap Facebook İnsgtram
Esta muy biem